Showing posts with label recipes. Show all posts

Monday, 24 October 2011

Applesauce

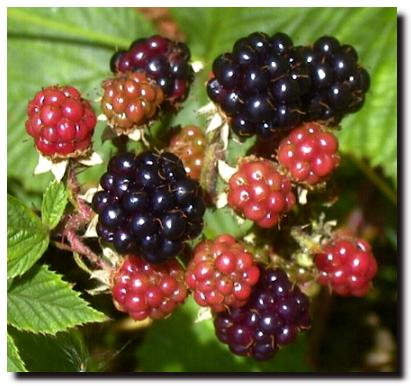
This recipe has no quantities, because it is entirely dependent on how many apples you have.  But as a rough guide, 8 good-sized apples made two large jars of applesauce - see left!

There are also no ingredients, apart from apples!  Though some recipes do suggest adding cinnamon, or even some sugar if the apples are tart.


Notes
The Americans are far more used to canning applesauce than we Brits are, and so they have a whole lot of specialised equipment, such as jar grabbers, water bath pots (with built in rack for raising and lowering the jars, etc.  If you have such equipment, then I presume you know how to use it.  I would also advise investing in such equipment and following the instructions closely if you have a vast quantity of apples to process.  Nothing could be worse than all the jars spoiling for the want of precise attention.

However, if like me you only have a few apples to deal with and want to have a go, then this is my improvised version.  The final product looks good, and I am hoping the jars last okay.  I shall keep at least one jar until Christmas, and will report back if it has survived or not.  Caveat emptor!


Equipment you will need:
- approximately one large jar per 4 apples.  Kilner jars are best, though any with a tight-fitting lid should work.
- a deep and heavy-bottomed pot, such as a stock pot, with a well-fitting lid.
- something to improvise a rack at the bottom of the pot - I used an upturned plate, though be careful that it is one that can withstand a lot of heat (my Ikea one cracked!).  A metal grill of some kind would work better - anything to keep the jars from sitting on the base of the pot. 
- something to remove the jars safely from the boiling water.  Americans have special jar grabbers: I poured off some of the water, and then used a silicone oven glove.
- apple corer or sharp knife; wooden spoon; large serving spoon or ladle.


Method

Please be carefull!  As with jam, you are dealing with very high temperatures, and the absence of specialised equipment increases the likelihood of spills and burns.

1) Before beginning, you need to sterilise your jars.  Put the jars on their sides on a rack in the oven. Turn the oven to 140C, and when it reaches this temperature, turn it off.  Leave the jars in the oven until ready to use.  For the lids, boil them for 5 minutes.  Or if you have a dishwasher, run jars and lids through a cycle.

2) Wash and core your apples, and remove any bruised or nibbled bits.  You can peel them if you want, but I didn't bother.  But do make sure all the nasty bits around the seeds are removed.  While you are doing this, you can place the cut apples in a large bowl of water to stop them discolouring too quickly.  You could add a touch of lemon juice to the water.

3) Fill the large pot with about an inch of water, and add the apples.  Put the lid on tightly.  Bring rapidly to the boil, and then reduce the heat.  Simmer for around 20 minutes, until the apples are disintegrated and fluffy.  

4) If you did not peel the apples, pick out the skins at this stage.  If there are any lumps left, mash them with a potato masher, or with a wooden spoon.  If the sauce seems too watery, you can boil some of the liquid off, stirring all the time and being careful that it does not stick to the bottom or burn.  Keep the applesauce hot.

5) Spoon the hot applesauce into the jars, wipe off any spills around the rim, and seal tightly with the lids.

6)  Wash your large and deep pot.  Place the rack in the bottom, and sit the sealed jars on the rack.  Cover the jars with hot water so that they are about an inch below the surface.  Bring to the boil, and boil the jars for 20-30 minutes.

7) Carefully remove the jars from the water, and allow to sit until cold.  You will know if they are properly sealed by pressing the top of the jar: if it doesn't 'pop' in and out, it is sealed.  If any are unsealed, simply put them in the fridge and use within a week.
If using kilner jars, you should loosen or remove the screw part of the lid, so that it doesn't rust.  The top will stay completely sealed.
Store the jars in a cool dark cupboard.

Monday, 17 October 2011

Day 109: And We Have Jam!

Apple and Bramble Jam *ting*
Six jars, to be precise.  Six jars of beautifully clear and, I suspect, somewhat over-solidified Apple and Bramble Jelly.  Well, technically, I only have three jars, because the other three belong to Friend Claire.  But there they are, ranged on my kitchen work surface, making gentle little popping sounds as they cool and their seals tighten.

This has been a happy experience.  A new skill has been learned, if not exactly mastered.  (I think they may be very over-solidified.)  The frothy skimmings been consumed on some freshly-made soda scones, and I can confirm the general deliciousness of the final product. I don't think the jam is gift-able, which is a shame - one jar could have made a nice little Christmas present for someone.  But for a first attempt, I think this can be declared a qualified success.

The only casualty has been my tea towel.  It is currently soaking in some stain-removing product called Wizz Oxi Ultra Plus, which my predecessors left behind.  Friend Claire the Chemist watched with scientific interest as the tea towel turned from purple to black to brown to a kind of dirty beige, poking it occasionally with a plastic whisk selected for its non-reactive properties.  If this stuff works, I will give it a massive plug on this blog, because it will truly be a miracle product.  This despite the rather alarming instructions NOT to put the damp scoop back in the tub, lest it produce some kind of oxygen explosion under the sink. 

The sugar cost £1. 
That is six jars of jam for £1. 
Definite Frugal Win. :)

Day 108: The Jam Begins

Woohoo!  Friend Claire came round tonight, and we have embarked on the Bramble and Apple Jelly!  The first part of the process is complete, and we are feeling highly pleased with ourselves.

The great thing is that, apart from the sugar, this foodstuff is entirely free.  The brambles which have been lurking in my freezer for a month were combined with an equal quantity of apples, some donated by a neighbour of Friend Claire, and some very kindly supplied by Friend Julie from the vast quantities her Victorian garden has been producing this harvest.  As Friend Claire and I observed, while stirring our pot of rich, deeply-purple, aromatic fruit, there is a peculiar delight involved where the food is not only free, but moreover, has been harvested by our own fair hands.  My highly rationalist scientist friend was even heard to mutter slightly sheepishly, that without getting too New Age-y about it, the whole process did somehow put us more in touch with our food.

We have been following this recipe which we found online.  The quantities listed here handily matched almost exactly the amount of brambles we had - it turns out that we had managed to pick just over 2lb on our foraging trip.  The link also contains some very useful advice for sterilising jars, cloths, etc, so we have been following it pretty closely.

Improvisation rocks!
On a practical level, we have managed so far without specialist equipment.  Not having a jam pan, my large heavy-bottomed stock pot is doing the job fine.  We also have not been able to borrow a jelly bag, so we have improvised with a large linen tea towel.  Learning from my rosehip syrup success, we placed the tea towel in a metal sieve over a baking bowl.  We ladled the bramble mixture carefully into the teatowel, and then tied the opposite corners of the tea towel firmly together.  We then removed the sieve and suspended the tea towel from an old mop handle which we have laid across the backs of two chairs, with the baking bowl on the floor to catch the liquid. It will stay there overnight.  So far it seems to be working well, though I suspect the tea towel will never recover.  I also have little hope of the decarnadination of the wooden spoon.

Friend Claire is coming round tomorrow in the early evening so that we can complete the process.  We could perhaps have done the whole thing in one night had we been prepared to squeeze the juice through the bag - but according to Mother, that is the surest route to (horrors!) a cloudy jelly.  Therefore we are giving it the time it needs.  We think we have enough jars - a mottly collection of there ever was one - but I need to buy in some sugar and some of these little wax disks.  I remember helping Mother with this stage often enough, so hopefully all the necessary techniques will come flooding back from the deep recesses of my memory. 

What I am currently loving about this frugality project is that I am truly learning new skills - or relearning old ones.  I have watched jam-making often enough, and been involved in the various stages, but I have never seen the whole process through myself.  And to make the project even more enjoyable, it has meant some days-out-with-a-difference with Friend Claire in particular.  Where last year we would have been eating out or sitting in the cinema, this time we are doing things.  And this is a good thing.

Tuesday, 11 October 2011

Rosehip Syrup

Adapted from Marguerite Patten's Feeding the Nation.

Makes 2 cups rosehip syrup - enough for 2 people for 6-8 months, if taken as a few drops daily.

Ingredients
1lb rosehips, ripe and red
9oz sugar

Method
1) Wash hips and 'top and tail' (remove stalks and greenery).  Put in a heavy stainless steel pan.  Cover well with water and bring to the boil.  Simmer until tender - about 10 minutes.

2) Mash hips well with a wooden spoon so that they are all broken open.  Put into a jelly bag (see Notes) over a bowl, and squeeze out as much juice as possible.

3) Return the pulp to the saucepan and add the same amount of water again.  Bring to the boil and simmer for another 10 minutes.  Pour back into teatowel and squeeze again into the bowl, adding to the juice from the first round.

4) Bin the pulp, and wash out the teatowel very thoroughly.  (I put mine through the washing machine.)  Pour the juice once again into the teatowel.  Do not squeeze this time, but allow to drip through into a clean bowl overnight, without stirring or pressing.  This should ensure that the liquid is hair-free!

5) Boil the juice down until it measures about 2 cups (16 fl. oz.)  Add the sugar and stir until dissolved.  Boil for 5 minutes.

6) Either:
(a) Bottle the syrup in small jars.  The jars must be perfectly clean and hot - put them through the dishwasher and use immediately, or sterilise with boiling water and keep warm in the oven until ready for use.  Seal the jars at once, using rubber washers to ensure a perfect seal.  The syrup should be stored in a dark cupboard.
or
(b) Do what I did and freeze the syrup in ice cube trays, so that a very little can be defrosted at a time.  I think this works, but don't guarantee it yet!  I'll update this recipe as I find out.


Notes
I didn't have a heavy stainless steel pan, and an ordinary cheap one worked fine!  Just watch a little more closely in case the bottom burns.

I also didn't have a proper jelly bag, and was wary of using a borrowed one in case the little rosehip hairs got stuck in it and spoiled it.  You can improvise a jelly bag with layers of muslin, but I found a simple linen tea towel worked very well, and moreover, was tough enough to endure squeezing.  The red stain washed out fine, at least when I washed it straight away.  Just put a metal sieve over a large baking bowl, and put the tea towel in the sieve to hold everything in place; then pour into the sieve.

Serve as a Vitamin C supplement, taking about 1/4 tsp a day.  Alternatively, pour some over icecream, or use to flavour home made icecream or desserts.

Saturday, 8 October 2011

Lemon Drizzle Cake

Makes c.10 slices

Ingredients
4 oz soft margarine
6oz caster sugar
2 large eggs
6 oz self-raising flour
4 tbsp milk
rind and juice of 1 lemon
3 tbsp icing sugar

Method
1) Grease and line the bottom of a 2lb loaf tin.  Preheat the oven to 180C.
2) Cream together the margarine and sugar.  Beat the eggs, add to the mixture, and beat well together.
3) Add the sifted flour, the lemon rind, and the milk.  Mix well.  
4) Put mixture in tin, and smooth top.  Bake for 40-45 minutes, until firm and lightly browned.  
5) While the cake is baking, put the lemon juice and icing sugar in a pan, and heat gently until the icing sugar is dissolved.  
6) As soon as the cake comes out of the oven, use a skewer to make several deep holes in the top.  Immediately pour the lemon-sugar mix over the cake.  Leave the cake in the tin until completely cool before removing.

Notes
This makes a gorgeous sticky cake.  It counts as economical, given that a slice of lemon drizzle cake costs about £2 in any cafe.  I am not sure what the whole cake costs to bake, but it is a whole lot less than £20!  I had a vegetable bake on the bottom shelf of the oven while this was cooking on the top.  Half of the final loaf has gone in the freezer.

Caster sugar costs more than granulated.  Friend Claire recently suggested buying granulated sugar and whizzing it in the food processor to make caster sugar.  I gave it a try and am not altogether convinced it made much difference - but maybe your food processor is more efficient than mine.  I have never had a problem working with granulated sugar anyway, unless it is meringues. 

If making the cake in a food processor, then add the sugar, margarine, and eggs all at once, and cream together before adding the other ingredients.  This is how I did it, and it worked well.

Tuesday, 30 August 2011

Gingerbread

makes c.24 slices (3lb gingerbread)

Ingredients
8oz margarine
8oz soft brown sugar
8oz treacle
8oz plain flour
4oz self-raising flour
4 tsps ground ginger
2tsp cinnamon
2 eggs
1/2 pink milk
2 tsp bicarbonate of soda

Method
1) Grease and line a 2lb plus a 1lb loaf tin (or alternatively, an 8"x12" square tin).  Preheat oven to 150C.
2) Heat margarine, sugar, and treacle in a saucepan until melted.
3) Sift flour, ginger, and cinnamon together into a bowl.  Stir in the treacle mixture and the beaten egg.
4) Warm milk to lukewarm, stir in bicarbonate of soda, and add to flour mixture. (This will make the mixture very liquid.  Do not panic!)
5) Beat well and pour into tins.  
6) Bake for 1.5 to 2 hours.


Notes
This is not a cheap recipe.   In particular, it uses a lot of sugar and margarine.  Nevertheless, it makes a large quantity of a dense, rich cake, which freezes well.  What's more, it can be baked for about the same time and temperature as a casserole, making full use of the oven.  And it is delicious!

Chicken and Mushroom Pie

serves 4-5

Ingredients
2 chicken breasts
1/2 a medium onion
250g mushrooms
1/2 cup sweetcorn 
1tbsp vegetable oil
1 tbsp plain flour
1/2 cup milk
salt and freshly ground pepper

For the shortcrust pastry:
1 cup plain flour
3 oz margarine
pinch salt
cold water

Method
1) First make the pastry.  Mix the flour and the margarine into 'breadcrumbs' and add the salt.  (It is easiest to do this in a food processer.)  Add enough cold water to bind into a ball of dough.  Wrap in clingfilm and put in the fridge to rest for at least half an hour, or make in advance and keep for up to 3 days.
2)  Chop the mushrooms and onions and fry in  the vegetable oil until cooked and lightly browned.  Add the sweetcorn and fry briefly.  Remove to a plate.
3) Fry the chicken chunks until lightly browned on all sides, but not cooked all the way through.  Add more oil if needed.
4) Sprinkle the flour into the pan with the chicken, add the seasoning, and fry briefly.
5) Put chicken and vegetables into a shallow oven-proof dish, and pour over the milk.
6) Now roll out the pastry to the size and shape of the oven-proof dish.  Place over the top of the chicken mixture and press round the edges to seal.  Cut three slashes in the middle of the pie to allow steam to escape.
7) Bake in a 160C oven for around half an hour, or until pastry is lightly browned.  Serve immediately.

Saturday, 20 August 2011

Boston Baked Beans

serves 4 as a main meal

Ingredients
8oz (250g) dried white haricot beans
1 pint (500mls) water
1 onion, peeled and sliced
2 cloves garlic, chopped
1 bayleaf
1 tsp English mustard
2 tbsp black treacle
1 tbsp dark brown sugar
3 tbsp tomato puree
6oz (175g) bacon bits
salt and freshly ground black pepper

Method
1) Soak the haricot beans in water for 8 hours or overnight.  Drain.
2) Put the beans in the slow cooker and mix in the chopped onion and the bacon bits.  
3) Blend the mustard with a little of the water, followed by the black treacle, sugar, tomato puree, and chopped garlic.  Mix with the rest of the water, and pour over the bean mixture.  Season, and add the bayleaf.
4) Cook on low for around 8 hours.  For the last hour, remove the lid and thicken the sauce by allowing some of the liquid to evaporate.  If the mixture is too dry, add some more water.
5) Remove the bayleaf and serve hot, with crusty bread and a sprinkle of grated cheese, if desired.


Notes
This produces beans in quite a watery sauce - it is not thick like a tin of baked beans.  You might therefore want to serve the beans in a bowl.  To accompany it, I used home-made focaccia; or girdle (soda) scones would also work well.

Haricot beans used to be the most commonly available, if my wartime rationing book is anything to go by.  I actually had great difficulty finding them - the supermarkets didn't seem to stock them - but eventually tracked them down to an ethnic food store.  They were quite a bit cheaper than any of the others on sale, at only 78p for 500g.  

I haven't tried this, but it occurs to me that you could make this more of a main meal by omitting the bacon pieces, and instead burying a whole bacon joint in among the beans.  Then remove the joint at the end, carve it, and serve all together with a baked potato or oven chips.

Hummus

serves 4-6

Ingredients
1 cup cooked chickpeas (about 1/2 cup dried, or 1 x 400g tin)
juice of 1 large lemon
4 tbsp tahini
3 tbsp virgin olive oil
1 garlic clove, peeled and crushed
salt and pepper

Method
1) Using a food processor, puree the cooked chickpeas with the lemon juice.  For a smoother hummus, press the chickpeas through a fine sieve.
2) Add the tahini paste, the olive oil, the garlic and seasoning.  Blend until smooth.  Taste, and add more lemon juice if desired.
3) Put in a serving dish and pour on a little more olive oil.  Sprinkle with chopped parsley if desired, and serve as a dip for raw vegetables, or with pitta bread.

Thursday, 18 August 2011

Day 48: Lady Bountiful's Legacy

Without actually meaning to collect them as such, I have a fair number of delightful old books around the topic of cooking and/or housekeeping.  Some I have picked up in secondhand shops over the years, but quite a few of them were rescued from my grandmother's house when she moved in with my mother.  This includes the very wonderful 1001 Pudding Recipes from 1913, which I maintain would be better titled, 1001 Things to Do with an Apple

These books have taken on a new interest in my attempt to live without some of the more expensive modern commodities.  So much so, that I intend to profile some of them over the coming months, beginning with the grandmother of them all: Lady Bountiful's Legacy.

It sounds like a taudry novelette.  But, as it turns out, Lady Bountiful is the pseudonym of some busybody from the reign of Queen Anne, who was resurrected by an equally busy Victorian body as a vehicle for their musings on home economy.  This book was an ill-conceived 1881 Arithmetic Prize, "open to all the school" but clearly destined for some favourite girl, which was in the event won by my unfortunate great-grandfather.  According to its own subtitle, it is A Book of Practical Instructions & Duties, Counsels & Experiences, Anecdotes, Hints, & Recipes, in Housekeeping & Domestic Management.  Not unlike this Blog, in fact.

Anyhow, Lady Bountiful is a thoroughly annoying character and, I suspect, a man.  Nothing else could account for that peculiar mixture of utter confidence and total ignorance when it comes to housekeeping.  She knows nothing about everything, but spouts it anyway: Thirst, to prevent: In hot weather, eat plenty of fresh butter at breakfast.  Avoid drinking water as you would poison.  Alongside her antipathy to water, she has a worrying love of actual poisons: Chloride of lime has been found to be most effectual to rid a house of rats, mice, flies, wasps, and other similar annoyances. (She warns the housewife not to place this substance on her dresser, or the fumes will cause her china to lose its pattern!!)  Although entirely without medical training, she cites some thoroughly alarming remedies with the confidence of Dr Kildare: Creosote is said to be a remedy for sea-sickness.  (Note: DO NOT try this at home.)  Moreover, she gives credence to her madness by her own idiosyncratic interpretation of history, the recitation of increasingly gruesome anecdotes, and by peppering the narrative with the names of Famous Doctors whom we are obviously Supposed to Know.

That said, there may nevertheless be some useful things therein, and I intend gving it a more thorough read.  But for now I turn to the chapter Cookery for the Poor.  Be warned, that her recipes are vague to the point of being nonsensical, and much creativity may be needed to interpret them.  Nevertheless, having leafed past the recipes for  Sheep's Head Broth, and the disgusting-sounding Onion Porridge, I leave you with the slightly more palatable Rice Stew:

A red herring, or four ounces of lean bacon, cut in pieces; three onions; a few peppercorns, thyme, and parsley; boiled in three pints of water three quarters of an hour, with one pound of clean-picked whole rice.*  When it boils, set the pot by the side of the fire: the rice will swell, take up all the water, and become quite soft.  If properly done, it will weigh nearly five pounds, and will dine five men, as it frequently did in the year of scarcity, 1800.  If the rice is not sufficiently soft, add a little more water as it stands by the fire.

* yes, you are right, this makes no sense: do you boil the rice for three quarters of an hour, or just bring it to the boil and then let it sit?  I suggest frying off the fish or bacon, the onions, and the spices, then adding the water, rice, and thyme, and cooking until the water is absorbed.  Then stir in the parsley, and serve. 

Oh, and you might want to adjust quantities!

Today's Expenditure: 30p

Monday, 8 August 2011

Cheese Pudding

This is really a kind of cheesy-bready souffle.  It is a good way of using up slightly stale bread or tired cheese.
The recipe is adapted from Marguerite Patton's wartime one.  I found this very greasy, however, and also thought that it could use more bread than stated.  So here it is, slightly tweaked, with less margarine and more bread.

serves 2-4

Ingredients
1/2 pint (300ml) milk
1 generous teaspoon butter or margarine
3 oz (75g) breadcrumbs 
1 egg
3oz (75g) cheese, grated
salt and pepper

Method
1) Pour the milk into a saucepan and add the butter or margarine.  Heat until the butter melts.  Remove from the heat, stir in the breadcrumbs, and allow to stand for 15 minutes.
2) Preheat the oven to 190C (170C for a fan oven).
3) Whisk the egg with a fork, and add to the breadcrumb mixture with the cheese and seasoning.  Mix well.
4) Pour the cheese mixture into a 1 pint casserole dish.  Bake for 30 minutes or until well-risen and golden.
Serve hot, with a green salad.


Notes
When this emerges from the oven, it will be the temperature and consistency of molten lava.  I let mine cool a little!
Although the final quantity looks small, it is surprisingly filling.  Marguerite's has less bread than mine, and yet she suggests that it feed 3-4.  Maybe with a large salad, it would!

Broccoli and Feta Quiche

serves 6
The pastry base, uncooked

For the Pastry
2 cups plain flour
4 oz margarine
2 tsp dried mixed herbs (optional)
1/4 tsp salt
1/3 cup milk

1) Add the flour, the margarine, the herbs, and the salt to the food processor and whizz to make 'breadcrumbs'.
2) Gradually pour in the milk, whizzing all the time, until a ball of dough forms in the food processor.  This should not be too sticky: if it is, add some more flour.
3) Remove from the food processor, knead very briefly, then place in a plastic bag or wrap tightly in clingfilm.  Place in the fridge and allow to 'rest' for about half an hour.
4) Remove from fridge, and roll out thinly (about 3 mm).  Line an 8 inch quiche dish, and trim the edges.  (There is no need to prick the base.)

Preheat the oven to 220C (200C for fan oven).


The Final Result!
For the Filling
7 medium eggs
3/4 cup milk
1/4 tsp salt
1/4 tsp finely ground white pepper
1 small head of broccoli, cooked
100g feta cheese

1) Beat the eggs with a fork.  Add the milk, salt, and pepper, and beat well.
2) Break the broccoli into small florets, and arrange on the pastry.  Pour over the egg mixture.
3) Cut the feta cheese into 1cm cubes, and sprinkle over the quiche.
 4) Place in oven, and cook at 220C (200C) for 10 minutes.  Then turn down the oven to 180C (160C), and cook for a further 25 minutes until browned.  Remove and serve immediately, or allow to cool.


Notes
Shortcrust pastry is really easy to make, especially if you use a food processor, which is the method described here.  Alternatively, do it by hand.  The pastry can be made well in advance, and rested in the fridge for anything from half an hour to a couple of days.  (Resting stops the pastry shrinking away from the sides of the dish, and makes it easier to handle.)  Or it can even be rolled out, used to line the quiche dish, and then covered and frozen until you are ready to use it: just add the egg mixture and cook straight from frozen.

There will always be pastry trimmings left over - I used these to line some ramekin dishes, which I have frozen as they are, uncooked.  Then, when I am next using the oven, I can add another beaten egg, etc, to each one and cook straight from frozen. 

The first secret of this quiche is to add more milk than seems intuitive.  This makes more of a soft custard, which sets very flat instead of puffing up.  (And is also more economical, making the eggs go further.)  

The second secret is in the baking.  The first 10 minute blast at 220C cooks the pastry base so that it doesn't go soggy.  This means you don't have to bake blind the pastry, which can be a complicated business.  Then the lower temperature of 180C gently sets the egg.

The filling here is a lovely one - baking makes the feta cheese go all soft and creamy, without actually melting.  I have also gone fancier with this in the past, spreading tomato puree on the base of the pastry and then adding a layer of cooked spinach before pouring on the egg.  But of course, all sorts of other fillings can be used.  The bacon bits, if you fry them first, will make for a classic Quiche Lorraine.  Or fry an onion, add grated cheddar cheese, and then sprinkle some dried mixed herbs on the top.  Voila!  Cheese and Onion Quiche.

This freezes really well, and makes for a good packed lunch.

Monday, 25 July 2011

Simple Guacamole

I have no doubt that there is a 'proper' guacamole recipe out there.  Most of the official ones seem to contain chillis and be quite complicated and spicy affairs.  However, I am quite fond of a simpler garlicky-lemony flavour, and don't tend to add too much heat to mine. 

Avocados can be expensive, but they aren't too bad at the moment.  I found a large one in Lidl for about 80p.  Lidl is also currently selling 4 unwaxed lemons for about the same price, though you could use bottled lemon juice if that is cheaper and more available.

serves 4 as an accompaniment

Ingredients
1 large ripe avocado, or two small
juice of half a lemon
1 clove garlic, crushed
pinch of salt and pepper
dash tabasco sauce (optional)
1 large tomato, chopped (optional, but nice, and makes the guacamole go further)


Method
Cut avocado in half and scoop the flesh into a bowl.  Immediately mash with the lemon juice to stop discolouration.  Mix in garlic and seasoning, and then stir in the tomato.  

Serve in a sandwich, or as a dip.  (I ate mine with my falafels - fusion food!)

Ideally this should be served immediately, but I covered mine tightly with clingfilm, and it kept quite happily in the fridge for two days

Jam Sponge Pudding

The end result should look something like this!
Traditional pudding recipes ask you to cover and steam a pudding for about 1-2 hours.  Unless you have an Aga or something that is on anyway, this takes a great deal of fuel.  I suppose it could be done in a modern steamer - it might be worth a go.  However, I discovered some time ago that your basic "steamed pudding" also cooks beautifully in the microwave in only 3 minutes. 

This recipe is adapted from one of my most useful baking books: The Anniversary Cook-Book (sic) of the Dumfriesshire Federation SWRI.  That's the Scottish Women's Rural Institute to you and me, or simply, "The Rural".  The cookbook was a long-ago gift from an aunt, and what The Rural doesn't know about baking isn't worth knowing.

This recipe is easily halved.

serves 4-6

Ingredients
2 eggs, and their weight in margarine and sugar
5 oz self-raising flour
3 tbsp raspberry jam

Method
Cream (beat together) the margarine and sugar until light and fluffy.  
Add the beaten egg and the flour alternately to the creamed mixture.
Cut 1 tbsp of jam through the cake mixture, but not really mixing.  (you can omit this, and save a spoonful of jam)
Put the other 2 tbsp jam in the bottom of a greased pudding bowl.  Spoon the cake mixture on top.

To Steam: cover with greaseproof paper (make a fold in it to allow for expansion, and secure with string or an elastic band).  Steam for one hour.

To Microwave: cover with clingfilm or simply a plate, and microwave for 3 minutes only.

To serve, loosen the edges with a knife, then turn out onto a plate so that the jam drips down the side.  To achieve the heights of true comfort food, serve with custard!

Frugal Bolognaise

Serves 6-8

Ingredients  
1lb (500g) minced beef
50g bacon bits (optional)
1 can chopped tomatoes
1 medium courgette (zucchini), grated
1 medium onion, chopped
2 cloves garlic, crushed and chopped
2 tbsp tomato puree
2 tsp dried mixed herbs
salt and freshly ground pepper

Quick Prepare Method
Preheat the oven to 180C.
Combine all the raw ingredients in a large bowl.  Get your hand in there and squeeze them all together!
Place in a casserole dish, cover, and put in the oven.  Cook at 180C for half an hour, then turn down to 140C and cook slowly for another couple of hours.  
Remove and serve on rice or pasta.
Alternatively, use the slow cooker and cook on Low for about 4 hours.

Quick Cook Method
1) Using a large frying pan or ovenproof pot, fry off the bacon (if using), the onion, and the courgette until soft.  Use a little oil or bacon fat (the bacon bits might provide enough).  This will take around 5 minutes.  Add the garlic, and fry for another 2 minutes.  Remove from pan.
2) In the same pan, fry the minced beef until browned.
3) Return vegetables to the pan and stir in the tomatoes, the puree, the herbs, and the seasoning.  Simmer for around 20 minutes to reduce and thicken the tomato liquid.  Serve over pasta or rice.


Frugal Notes
The first rule of frugality is track down some cheapish minced beef.  It doesn't have to be top quality Steak Mince.  But at the same time, you don't want to go too cheap. (I have dark memories of the bag of frozen mince I bought once as a young student.  You had to pick the wee tubes out of it.)  But even so, minced beef is one of the cheaper meat options, if you compare it to a pork chop or a chicken breast.  What's more, you can bulk it out to make it go a whole lot further.  Lidl does a good quality Scottish Beef Mince, and other supermarkets and butchers may have their own decent offers. 

Yum!
The other thing to look out for is some cheap cans of tomatoes.  Supermarket own brands are usually very cheap, if you aren't too fussed about the organic thing.  (I have seen them as low as 9p, though they all seem to be 33p now.)  Oddly enough, the chopped tomatoes are often more expensive.  As a young student, I learned to buy a can of Whole Plum Tomatoes, open it, and then swirl a knife around the can to produce the desired chopped effect!  However, in this case, I didn't use a can, because I had three over-ripe large tomatoes to use up.  I just chopped them roughly and put them all in, skin and seeds too.


A courgette (zucchini) is a marvellous thing for bulking out minced beef, as well as adding nutrition.  It grates easily by hand.  I am not fond of big chunks of courgette, but I can eat this recipe absolutely fine.  I have also served this to courgette-hating children, and they didn't even know they were eating it.  And of course, you can add all sorts of other vegetables.  Red peppers and mushrooms work particularly well.

Another way of making the meat go even further would be to prepare some dried kidney beans (follow the packet instructions precisely, or these can be poisonous), and turn the whole into a chilli with the addition of some dried chilli flakes or tabasco sauce.  This can be done on the second day of serving to ring the changes.

Lastly, a bolognaise can be made to go very far indeed, depending on how you use it.  Serve it like the Italians do: not piled up on top of your spaghetti, but stirred through.  Alternatively, stir some bolognaise sauce through some cooked penne pasta, place in a casserole dish, and top with a little grated cheese and some dried mixed herbs.  This can then be grilled for 3-5 minutes, or put in the oven for about 20 minutes.  This can be done with only a couple of tablespoons of the sauce, so that it goes absolutely miles.  It also freezes well.

Friday, 22 July 2011

Day 21: Fun with Falafel!

The Falafel worked!  Yes it did!  It worked, and was delicious, and very very cheap!  I also have about 3 meals' supply left over.

So basking in my triumph, I am going to do nothing else today but post my recipe.  It is an adaptation of one that you can find here: Falafel Recipe - which is far more authentic, of course.  But mine suited me, and was also much lower in fat.

So here you are:

Falafel     (serves 4-6)

Ingredients:
1 cup dried chickpeas
1 large onion
2 cloves garlic
2 tsp cumin
2 tbsp flour
salt and pepper
olive oil (preferably in a spray bottle)

Method
1)  Soak chickpeas overnight in plenty of water.  Drain, add fresh water, and bring to the boil for about 5 minutes.  Reduce heat, and simmer for at least one hour.  (I used my slow cooker.)  Drain, and allow to cool for at least 15 minutes. (3 days in my case!)

2) Roughly chop the onion and garlic, and add to the food processor with the chickpeas, cumin, flour, and and seasoning.  Whizz until the mixture forms a rough dry paste, and can be shaped with the hands.  (I had to do this in a couple of batches.)

3) Turn on the oven and preheat to 200 degrees celcius.  Spray the oil on a large baking tray.

4) With your hands, shape the mixture into balls around an inch in diameter, and space evenly on the baking tray.  The mixture makes about 24 balls. Or make them into burger shapes to use as vegeburgers.  Spray all the falafel balls with oil, and bake for half an hour until crisp on the outside and lightly browned.

Serve in pitta breads with lettuce, tomato, baba ghanoush, hummus, and/or thick natural yoghurt.  (Add some chopped mint leaves to the yoghurt, if desired.)  You could also shred some savoy cabbage instead of the lettuce!


Today's Expenditure: 70p